OpenVPN is an open-source platform for VPN connectivity where it provides secure point-to-point or site-to-site connections in routed or bridged setups as well as remote access capabilities.
1) Prerequisites and Configuration
- OPENVPN server supports Windows 10 and later versions. Here we have used Windows 10 machine.
1.1) Installing the OpenVPN server GUI on windows
First, we need to download the OpenVPN Installer. For that follow the following steps.
Step 1. Go to the link https://openvpn.net/community-downloads/ Community Section and then Download Section.

Step 2. As we have 64-bit OS, download the file as shown in figure below.

Step 3. Go to the location of the downloaded file and run the application.

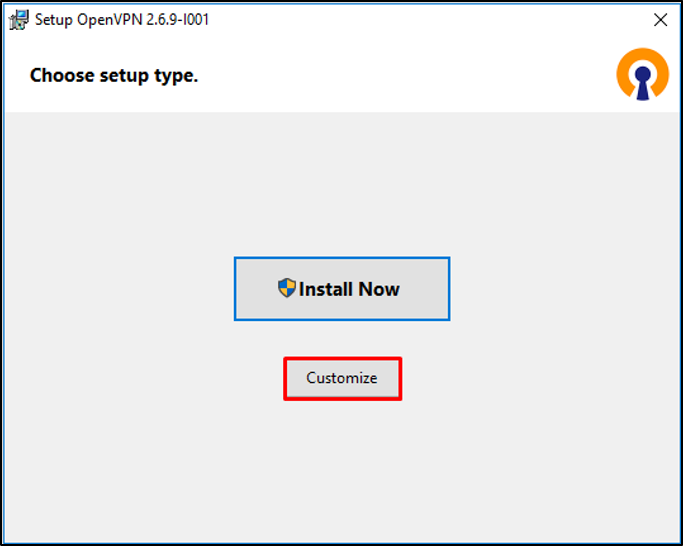
Step 4. As we are going to set up the server of our own. We need to customize a bit. So, click on Customize option.
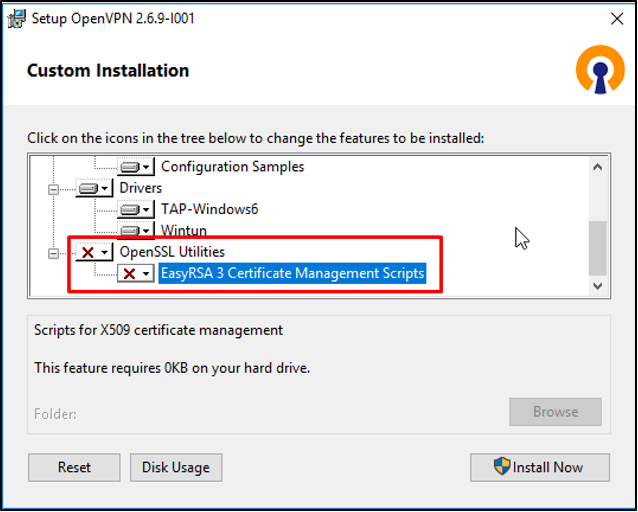
Step 5. Install the OpenSSL Utilities: EasyRSA3 Certificate management Scripts.
These utilities and EasyRSA 3 is for setting up secure communication channels and managing the PKI for OpenVPN respectively.
Before:
After:
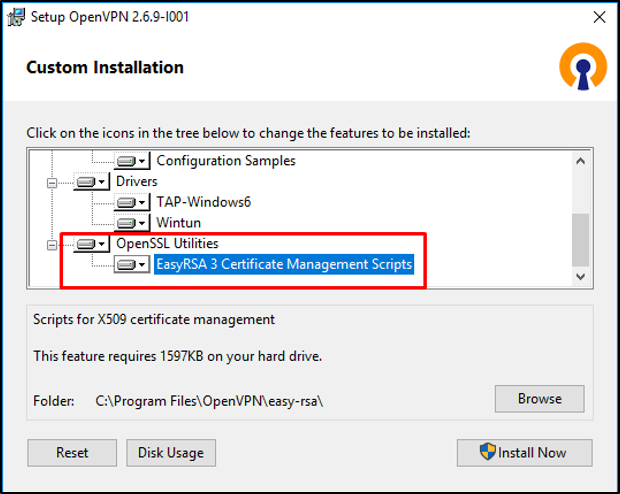
Then click on Install Now for further installation process and click “Yes” for proceed.
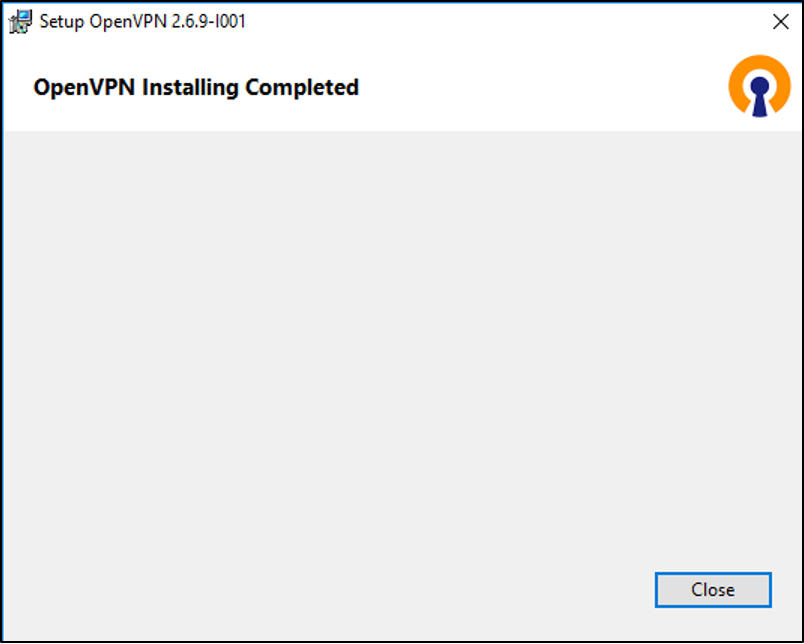
After completion of the installation process click on close.
1.2) Preparing EasyRSA
For RSA, run the command prompt as administrator.

Step1. Go to the easy-rsa folder by executing the following command.
cd "C:\Program Files\OpenVPN\easy-rsa"

Step 2. Launch EasyRSA from that folder.
EasyRSA-Start.bat

Step 3. Initializing the directory for the PKI before generating files with RSA. Need to run the following command.
./easyrsa init.pki
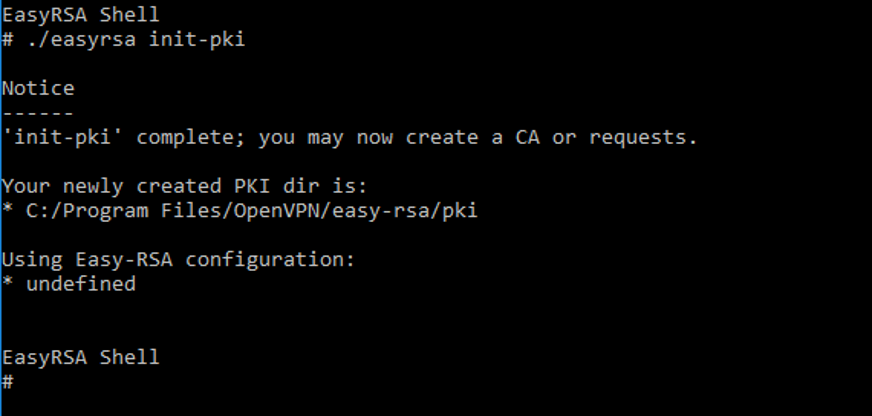
Step 4. Then open the vars.bat with the notepad which will store a information for generating certificates.
notepad vars.bat

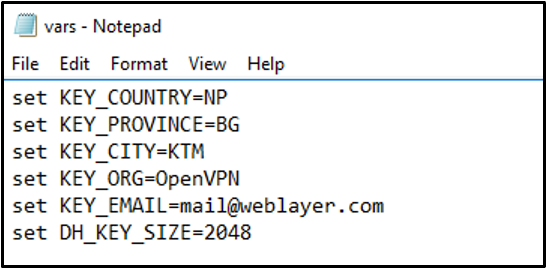
Step 5. Then save and close the file and run the following command.
vars.bar
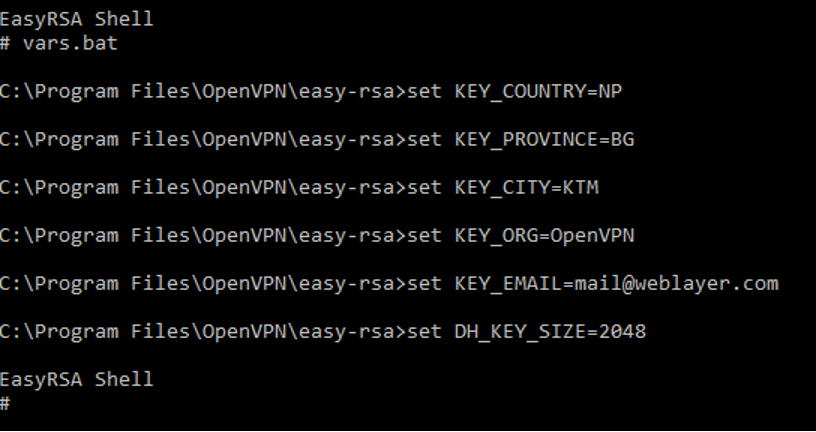
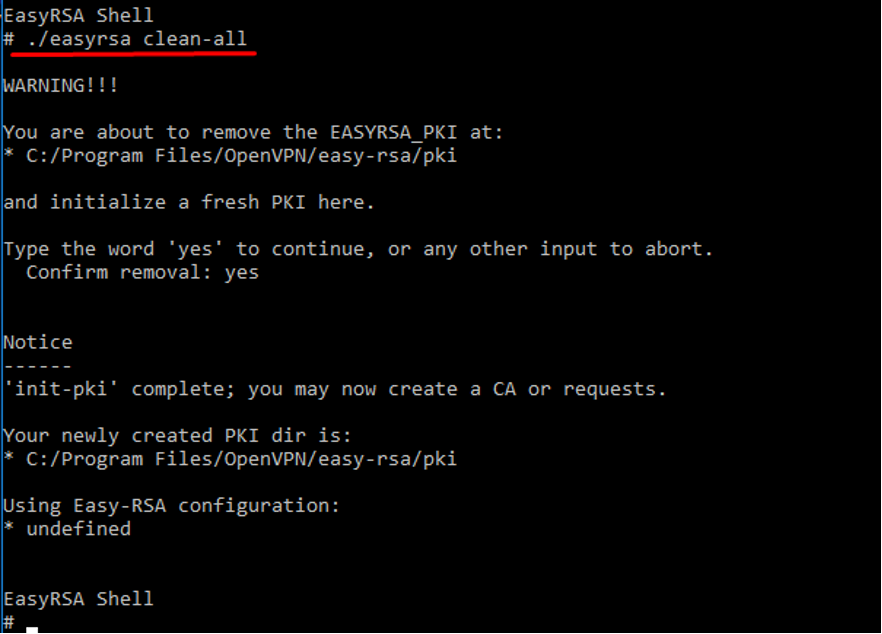
Step 6. Run the following command
easyrsa clean-all
1.3) Generating Certificate and Keys
Step 1. Run the following command to generate root- CA certificate which will be used to sign other certificates and keys.
./easyrsa build-ca nopass

Step 2. Run the following command for building the server certificate.
./easyrsa build-server-full WebLayerServer nopass

Step 3. Building the certificates and keys for the clients run the following command and types “yes”.
./easyrsa build-client-full WebLayerClient nopass
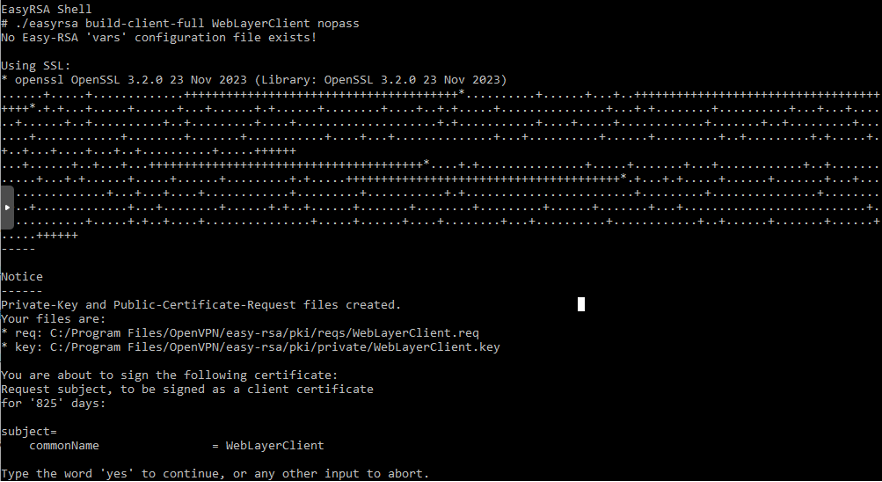
WebLayerClient can be replaced with the common name and nopass parameter will be prompt for choosing the client’s password.
Step 4. Generating Diffle Hellman parameters by running the following commands
./easyrsa gen-dh

Step 5. Generating tls auth key for additional protection.

Before running this command change the directory where openvpn.exe file exists.
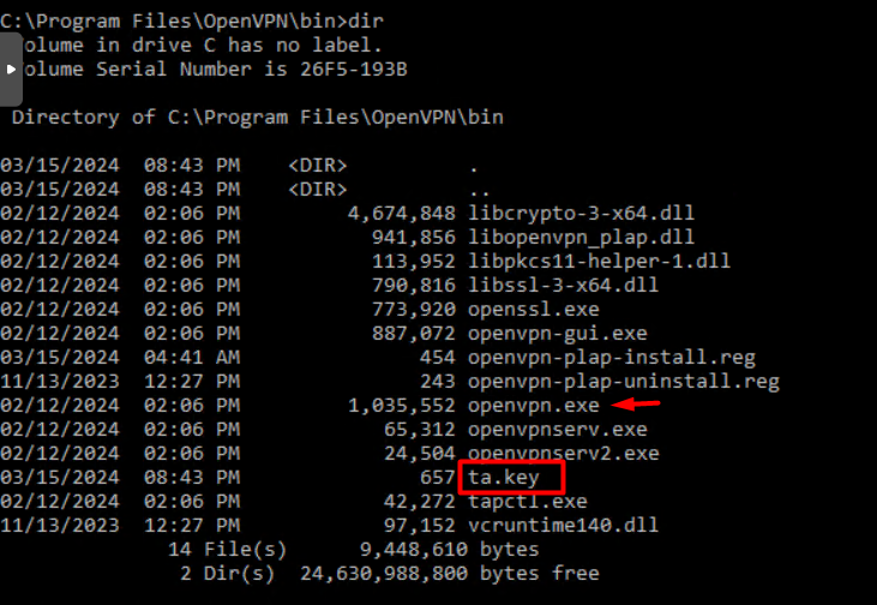
Here we can see ta.key file has been generated.
Then move to the ta.key file to the location “C:\Program Files\OpenVPN\easy-rsa\pki”
Checking all the generated files. Make sure all files are present.
Diffie-Hellman parameters: C:\Program Files\OpenVPN\easy-rsa\pki
CA certificate: C:\Program Files\OpenVPN\easy-rsa\pki
Client and Server certificates: C:\Program Files\OpenVPN\easy-rsa\pki\issued
Client and Server keys: C:\Program Files\OpenVPN\easy-rsa\pki\private
1.4) Server Configuration
Default sample configuration.

Copy these files to the config folder of the OpenVPN folder and rename it.

Then copy all the generated files in this location and don’t forget to rename the Diffie-Hellman file name with dh2048.pem since we have set parameter of 2048.
Hence the final config folder will be:
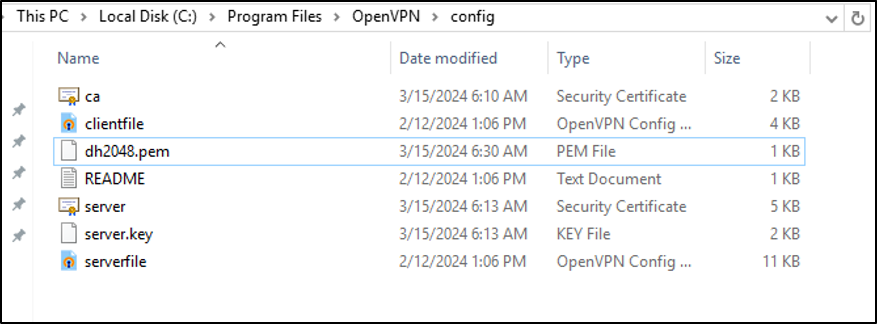
Note: Don’t forget to edit in serverfile from the notepad or any other text editor for mentioning the ca, cert key and dh file location with the filenames.
Open the serverfile with the any text editor do changes are per requirement and here is our server configuration file.
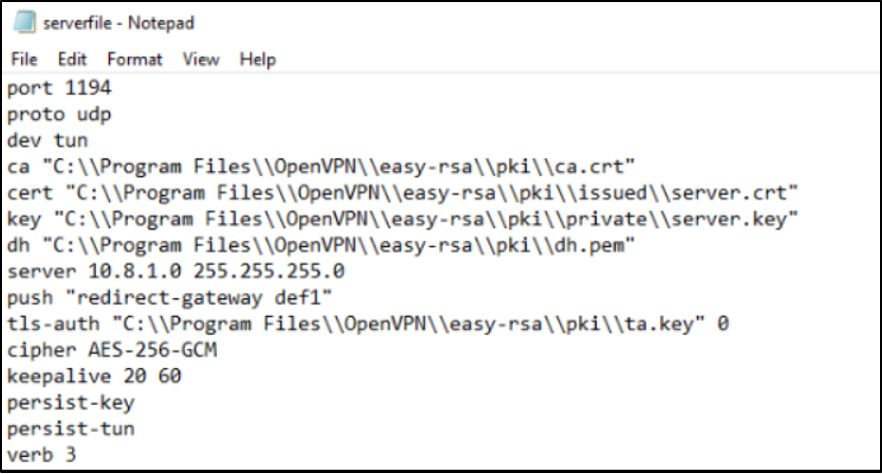
Additional configuration as per requirement
- proto udp to proto udp for allowing ipv4 connections only.
- starting lines with # can be removed.
- client config dir can be changed.
- ifconfig-pool-persist can be changed.
1.5) Server Launch
Client installation
Step 1. Go to the link https://openvpn.net/client/ [Resources Section and Downloads Section].
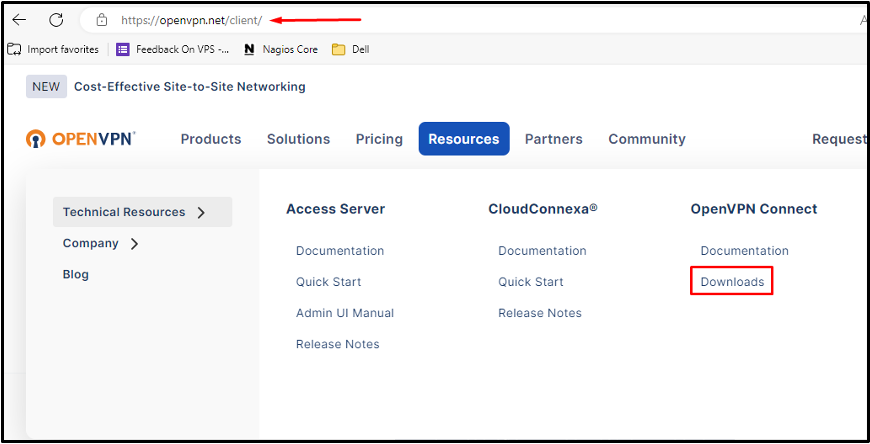
Step 2. Click on Download for setup file of OpenVPN.

Step 3. Go to the location of the downloaded file and run the application.

Step 4. Click on the Next button for processing the setup.

Step 5. Accept the license terms.

Step 6. Click on Install for installing OpenVPN.

Step 7. As setup is finished, click on Finish.

Step 7. As setup is finished, click on Finish.

Step 8. Agree the terms and conditions

Step 8. Connect open VPN as follows:
As we have generated the client files named with WebLayerClient which includes:
WebLayerClient.key located on “C:\ProgramFiles\OpenVPN/\easy-rsa\pki\private\”
ca security certificate file located on “C:\ProgramFiles\OpenVPN/\easy-rsa\pki\”
WebLayerClient located on “C:\ProgramFiles\OpenVPN/\easy-rsa\pki\issued\”
Step 9. After getting all the files required for the client to connect the server.
Just edit the clientfile.ovpn file then mentioned the above keys location in that file.Then copy that file to the client machine then connect it.
For demo, I have copied that file with the weblayer.ovpn name.

The select the weblayer.ovpn file then connect.

Result

Conclusion
In summary, the configuration of OpenVPN GUI server on Windows, along with its successful operation between server and client, showcases its reliability and effectiveness in providing secure, encrypted connections. This underscores OpenVPN’s suitability for organizations and individuals seeking a user-friendly VPN solution on Windows platforms.


